Wan’t vibrant hair colour, but don’t wan’t to deal with the $$$ and the damage? Quick and easy way to make your own colour clip-in extension

Alright, I know you ladies love to change it up once in a while, and don’t always have the cash to do so (lets face it, we wan’t to change our hair colour everytime our mood swings LOL). Here’s a service that I offer all my clients that gives them a fast change at less than half the price. Now, some of you might be wondering, why would i share this? Heres why, giving my customers the knowledge they might need, doesn’t make them hairstylists overnight:) they will try it …… and if they need assistance, they will come back to me for help. Plus, I am excited about this and I must share LOL!! I will be sharing with you all how to make colourful clip in extensions.

 For this you will need:

  • Hair extensions similar to the length of your hair( choose your colour and your length by the inches)
  • Wig clips(small, but any size will work, I just like small)
  • Curved weaving needle
  • Regular sewing needle big enough for thread to be fed through
  • hair clip that has a open mouth when squeezed
  • Hair weaving thread( its a thicker thread than normal, less likely to break hair and less likely to fray apart) ** People might now know this, but in the fabric store they have a brand called Guitterman that has a thicker sewing thread that is used in upholstery. This thread is similar……and most of the time, when on sale, you can get more for your dollar. You can also choose different funky colours to match the hair colour you chose;)
  • sharp scissors

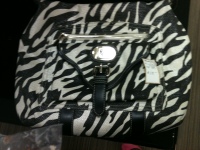
Step 1: Open pack of hair. You will see it fastened to package similar to this. You will want to detach all fasteners, to the point where yoiu can unravel the hair attached to the weft(thats the part at the top that is holding all that hair in place)


Step 2: For an effect like the one I’m going for, you want your colour to pop out from underneath your hair. So, start by holding one end of the weft at the edge and pull it across 1/4 inch from one side of the bottom of your back hair line like a measuring tape. Dont’t let go, take your other hand and pull it accross to the other side, horizontly to imitate a row of hair.  Mark the exact spot with your fingers, still holding on tight, remove the weft from your head. Now you can let go of the edge where the track stops, keeping grip of the spot where you measured.

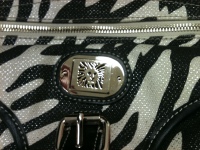
step 3: You will now fold that hair in half starting at the point where your fingers have marked, and you will cut the weft. To do this you will part the hair from the bottom up to the top of the weft, see picture. When cutting, make sure all hair is out of the way and only cut the weft axactly at the top. This is to prevent yourself from ruining the hair and making a mess. After cutting, you will be left with double the amount needed for the bottom row. Cut this in half now to be left with two exact measured rows.* Depending on how thick you want it, you can fold again a third or fourth time. After cutting like this, you will end up with 3 or 4 rows. Also, remember that the weft has a front and back side.  See the photo to understand what I mean.

FRONT (usually has one stitch)

BACK (Usually has two stitches)

Step 4:Pile the rows on top of each other right side up and clip with your open mouth clip .  Now you will sew all together using your weaving needle. First, you thread your needle leaving enough to complete the whole row, tie a not at the end, and start sewing. While sewing, you want to pierce through the weft to keep all pieces tightly together. Sew in through the front pushing needle in towards the back, and then push in a again, this time from the back in towards the front and continue. When you reach the end, you will back stitch(this means going in the opposite direction to lock in your stitch from unravelling, tie a not and cut thread).

BACK STITCHING

Step5: Turn the weft over to expose the back side and set down on a flat surface. Now take two or three wig clips(I used two) and lay them out. Place one on each end, and one in the middle(optional). Make sure that the toothed side is sticking upward towards the ceiling. If you make mistakes with this, you wont be able to clip them in.  At the top of the wig clips there are small holes, these are how you will attach them to your weft using a straight sewing needle. Thread your needle using the weaving thread and begin. I use the two end holes, and sew from the front towards the back and repeating until you can’t fit anymore thread through the hole, and knot. Repeat this for the next hole.   * USUALLY, THE BOTTOM ROW WILL NEED TWO CLIPS AND THE TOP ROW WILL NEED THREE CLIPS.

Step6: Try it out on your hair and see how you like it. If you would like, complete another row for thickness, using steps 1 to 5. This row will be attached a bit higher than the last row, therefore it will be a bit longer.

DIFFERENCE IN BOTTOM LENGTH TO TOP LENGTH

To try it out, you would run a comb through the back of the hair straight across from left to right or right to left, this doesn’t matter. You want to divide the top half from the bottom, by tieing the top half into a pont tail and leaving the botom half out. You will place the weft with clips across the division line and clip the clips onto the hair as snug as possible. It takes a bit of practise. Once secure, you will release the ponytail to cover the weft and blend your hair in as naturally as possible to the weave. You can also curl the hair and crimp, whatever you prefer. JUst make sure the hair is HEAT SAFE, or it will melt.
**Also, I found that the hair was too pale for my skin tone, so I coloured it using an Magenta INTENSITY from athe line called Joico Vero K-Pak. I will post a tutorial on how to do this in the future.
HERE IT IS!!

 You are now done……Congratulations……..You now have your own, custom, colour extensions!!!

Thanks for taking the time to learn,

Love Coco Prestige

You can paint laquered wood without sanding first!!!!!! 0_0

Well, had an eyelash appointment coming up and I could not stand to look at my oak coloured eyelash stool anymore!!! Let’s just say it was bugging me….so what did I do???? I painted it. What did I use to paint it? Regular, Hot pink, eggshell paint made by colourplace. I was first thinking about creating a zebra print design on the stool, using a light pink semi gloss BEHR paint, but I dropped that idea. It would take too long.

I also wanted to mention that this is by no means a professional way to get the job done..but it worked for me and it can work for you too! The stool is just a regular stool from IKEA, its called FRANKLIN and retails for $24.99 plus taxes.

What I used:

Medium width paint brush

Paint

Stir stick

Stool

Paint can opener or butter knife( I used a screw driver)

Garbage bag ( to protect floor from spills)

Step 1: Cut garbage bag in half at the seam to give yourself double the protection for your floors. This will protect you from spills. Lay it across your floor in a well ventilated area.

Step2: Place stool on top the garbage bag in the center

Step3: Open can of paint using paint opener tool or butter knife and stir well using stir stick.

Step4: Dip paint brush into can and wipe off excess against the edge of can. Start painting the seat, starting from one edge to the next.

Step5: Once seat fully covered, start to paint the back rest. Paint the entirebackrest, leaving the metal parts bare.

 Step6: Once the backrest is completed, go around all the side edges of the stool and make sure you get it all covered. Let dry completely.

Step7: Once dry, repeat steps 1 through 6 with a second coat of paint. Let dry.

Step8: Now this step is optional. Turn stool upside down and coat it with paint, leave all metal without paint. Let dry.

Step 9: Once completely dry, you are all done!!!! Test the stool out wearing an old pair of ants. Sit for at least fifteen mins…….if you stick…it is not dry lol!

You are now done!!

As the days went on with the stool being exposed to sun and the humid air, I found that the paint turned into more of stain rather than an actual layer of paint over the original stain. It still looks great and everyone loves it!

For the soap creators- Tutorial for making My Cotton Candy Soaps

This tutorial is something that I feel like sharing, just so you, the soap maker can get some ideas. This is not meant for you to copy exactly, just please use it as a guide. I will try to get as much tutorials posted to help all of you crafty soap makers. Now once again, this is for those who already have been making soap, so, I wont be giving away any formulas. I’m gonna keep it simple, SOAP MAKERS WILL UNDERSTAND;)  HAPPY SOAP MAKING!!

You will need:

  • Clear, scented,  melted, natural soap sitting in an aluminium pouring pot
  • Opaque, scented, melted,  natural soap sitting in an aluminum pouring pot
  • 4 soap molds or heat safe pba free , shallow containers( For opaque soaps)
  • 4 food grade colours(I used regular yellow, neon blue, neon purple & neon yellow)
  • 5 wooden or metal spoons for stirring( One for each colour, including clear soap)
  • Soap molds( as a soap maker, you will know the exact amount needed to hold all your liquid melted soap)
  • soap cutter or really sharp knives with no grooves
  • denatured alcohol

Step 1. Take your opaque soap off the double boiler and cool. Once cooled to about 130 degrees, pour it into container #1. You will want to divide all the melted soap into 4 by trying to pour 1/4 of the whole amount into that container.

Step 2. Squeeze drops of food colouring into the container and stir until you reach the desired colour. You want to make sure you mix until the colour is well blended using your spoon. Do not use the same spoon for all colours, or else you will ruin the colours. Try to mix it quickly, or else your soap will begin to start becoming solid.

Step 3. Repeat this with the other 3 containers, using  the different colours for each. Let each sit for 2 hours.

Step 4. Once cooled, pop the hardened soap shapes out and set onto a clean surface one at a time.


 Step 5. Proceed to cut into pieces( you can cut squares, trianlges, random shapes, or grate it). I used all these methods to complete the look I wanted.

Step 6. Place small amounts of pieces into each mold, leaving enough space for the other pieces.

Step 7. Repeat with each colour. Try to change shapes for each colour.

Step 8. Once all the soap shapes/colours have been filled into molds, take your denatured alcohol and spray all pieces, until sompletely saturated. No need to wait until dry.

Step 9. Remove your clear soap from the double boiler and let cool. You are now ready to pour your clear melted soap into the molds. Pour slowly, to cover and surround the pieces. Let sit and harden for 12 hours.

Step 10. Once completely hardened, pop out of molds and let air dry for another 2 hours.

Step 11. Package and store!! You have now completed my cotton candy soaps and can now start to plan your own creations 😉

SHOPPING~ Some cool items I found on my trip to the mall

Here are some cool and unique items I spotted on my latest shopping trip. Some of these are definate must-have’s, and the others are just neat. Of course I will update you if any of these are added to my collection ;). Take a look, you might see something you like.

This slideshow requires JavaScript.

Ring shopping….Yay me!!!!

Oh, YOU CLICKED CAUSE YOU THOUGHT I WAS TALKING ABOUT THAT KIND OF RING SHOPPING. LOL, unfortunetely no, I was just fashion ring shopping at the The Bay Days sale located in the OC(Oshawa Center mall).

Check out these unqiue rings.

This is probably one of thes nicest rings I have ever seen. Its a parrot’s head, covered in faux gold and crystals. Just beautiful!!! This ring is retailing for $24.99 with an additional 30% off. Gotta love it.

$6.99 Additional 50% OFF

Random Gems $9.99 Additional 50% OFF

Lizard ring: $16.99 Additional 30% OFF

Eagle head: $9.99 Additional 50% OFF

Pink ring to match my sweater: PRICELESS
LOL..ok Really it`s $6.99 Additional 50%

Swirls:$6.99 Additional 50% OFF

Sheild ring: $6.99 Additional 50% OFF

Leopard paw wrap around ring: $6.99 Additional 50% OFF

swirls with white crystal wrap around ring: $6.99 Additional 50% OFF

Another FAV 

Lepoard crystal headed ring with green eyes: $7.99 Additional 50% OFF

ANOTHER FAV

Looks 1000000000000 X better in person.

Triple stoned, triple finger wrap ring: $6.99 Additional 50% OFF

Huge charcoal crystal ring: $9.99 Additional 50% OFF

Not only were rings on special, necklaces, bracelets and earings were too. Here’s just a few that caught my eyes

The Bay wasn’t the only great place for jewellry. Look at what I found at H&M in the OC. These peices were all regular price.

AND FINALLY, THE BEST RING DEAL ………..

was at Stitches located at Hwy 401 and Brock rd in Pickering, ON.

Elephant ring with crystals: $1.50

Here it is beside my first, original leopard ring. I still luv u!

Luuuv

Now, ladies I advise you to go out and see what your local Bay has to offer. Hurry, before its all gone!!!!

Happy Shopping!!

My shopping trip~ The Bay Days Hand bag sale

 I’m really excited to share the wonderful items that I spotted today while out shopping on the OC(Oshawa Center mall) today. I found some amazing deals on super cool items.

 I went to THE BAY for the BAY DAYS SALE. They are having a 25% – 30% off all handbags, and wallets. Now this isn’t only the basic handbags and wallets, all the designer ones are on too. I was spotting handbags for $75.00 and $65.00, wallets went from as low $20.00 – $50.00. There were even tablet cases, they were $20.00 – $30.00 depending on the size and style, with an additional30% off.

How much better could it get. I was having a ball just looking and comparing. They even had featured items. I spotted the HOTTEST leopard print bag that was originally $130.00, but they had it displayed for $69.99. This bag is available in black & grey leopard or tan leopard print. I definetely will be returning to grab this bag….first I have to decide which one I like better. Take a look for yourself and you be the judge.

Here is the black & grey one, cute too….if your going for a neutral look. «Not that leopard print is neutral lol, but you get where I am going with this.

Here are some other cool handbags that caught my eye. The Ivanka Trump, Pink leopard one is definately one of my favs. A MUST HAVE!! Oh, and the fifth & sixth purse from the last is the same purse, it has different fabric on both sides, COOL!

Quick temperary fix to out of style fabric on wing back chair!

Now this is not meant to be the permanent solution, but it can work for any occasion just to upgrade the look in your home, for a short period of time while needed.

Supplies needed:

*Fabric

*Chair

*long and short sewing ball pins

*and your hands 😉

Now, my fabric was purchased from fabricland in Toronto, but feel free to venture anywhere you want to find your unique fabric print. I went with a Leopard mixed with zebra fabric as well as a solid hot pink that was going to add that extra tad of elegance within my livingroom. This way I could change up the look often.

My fabric was 54″ across and 78.7″ length. I chose this measurement because i needed enough to cover the front of my chair and I also need to have enough fabric left over to wrap around to the sides and bottom of the chair. About 10″ I left around the sides, you can decide how much you will leave depending on what suits your style of chair.

Now start with spreading the fabric over the front of the chair making sure the seat is fully covered and all sides have an equal amount  remainding, the bottom is allowed to have the least amount of fabric beacuse it wont be seen as much as the sides and back of the chair.

Start to tuck all fabric in and around the sitting part of the chair, make sure to “smooth the fabric, then tuck”. Always make sure the fabric is smooth before moving on. Depending on what type of chair it is, you can even pin down into the crevice of the chair to secure it won’t move, but you dont have to. I didn’t and it is fine. If you do choose this, then you will need an extra piece to cover the seat of the chair, you might even have tosew a cushion cover( which is not that simple, we won’t get into all that)

Tuck and pin

Now, once the seat part is all smoothed and tucked and pinned in the creases, smooth upward along the backrest. Work your way up the middle and tuck each edge into the sides pinning as you move up. Once you reach the top of the chair, take as much pins as needed and pin as tight as you can to assure that the fabric does not shift and is smooth. This is very important because if the pins are not snug, they will pop out eventually (not SAFE AT ALL).

Now, it is all safe to move onto wrapping the fabric around the sides of the backrest of the wing chair. For this I use a tuck and  fold method. This is when you pull the fabric tightly, slightly folding it, in order to roll over corners or edges, without a bulky look. Continue this down ward to the arm rest.

Roll and tuck and pin

 Roll and tuck and pin

Roll and tuck and pin

Now pull and pin fabric under the curve of the arm rest, this part must be asbolutely smooth. You wanna make sure that all pins are secure, since the arm rest gets a lot of pressure place upon it when people are sitting in the chair.

 Now move onto tucking in any loose fabric all around the chair. Dont forget to pin the fabric down in front of the chair and underneath the chair and at the top of the chair towards the backside of the chair. Remember, you want to pin the fabric around the legs, to not cover it and keep the chair fabric lines looking as clean and neat as possible.


This is the View from the top of the chair, looking down towards the backrest. This is where you should be pinning.

The chair is almost complete!

This is the view of under neath the chair, where you will pin the fabric to secure that it keeps everything in place.

 This is what the final product should look like. Now, once again, this is temperary. Only the front has been covered. This is a quick fix to update the look fast, when guests are visiting. I will update you all ith a more permanant solution in the future, so come back and check it out. Goodluck!!

Now the final over all look

Now………..

The pink version…….I luvv this one the best!!!

Cool party souveneir idea for any age

Cool party souveneir idea I came up with when planning my sons birthday party. I wanted something that had to do with him, something personal. So since his name is KING … I chose the theme The Royal Crown.

For this project you will need:

  • Pencil
  • Eraser
  • Foam sheets
  • Sheet of paper
  • Marker
  • Scissors
  • Lollipops
  • Tape or paper clips

Step 1: draw out a stencil pattern shape using your sheet of paper. Once you have the shape you want, cut it out using your scissors. Yay, step 1 complete!!

Step 2: Take your foam sheets and figure out how many of your shapes can fit onto one sheet. For my shape, I could fit four shapes onto one sheet of foam. If your pattern is similar to mine, fold your foam directly down the center once, then again to create four equal rectangles. Unfold this sheet and darken all fold lines with either your pencil or marker, to make it easier when cutting.

Step 3: Cut out all rectangles using your scissors. I ended up with four sheets of foam, divided by four, which left me with sixteen rectangles.

Step 4: This can be done two ways. You can either fasten two pieces of foam rectangles together using your tape or paper clips, or you can  keep them as singles. Now trace your stencil onto your foam.

Step 5: CUT. Cut out each shape out of the foam as neat as you can. Detach any tape or paper clip, if you chose this method. Lay out all shapes and personalize with a message. My message read, Kings 4th B-day. You can write whatever you choose.

Step 6: Take the point of your scissors and poke a small hole into the direct center of your shape. Rock the scissors gently, while applying pressure to the foam. You might want to have a scrap piece of foam to place under this peice of foam to avoid injury, or damages to furniture.

Step7: Insert lollipop sticks into foam from the blank backside, through to the front. Now you are done. Your cool party souveneirs are complete and ready to be displayed.

Hello world!

Hi, I am a young entreprenuer looking to share my wonderful and creative ideas with everyone interested. I like to consider myself unique and out of this world. The things that interest me are a bit different, but I hope all of you can get on my level for a short while……and check my blog out! I will try to keep you all interested…so stay tuned!!! Its about to get EXCITING!!!!!!!